Spacemacs and Alchemist to make Elixir of immortality
Ok, lets be clear; this post is not about immortality, that will be for next time :). Instead its about transitioning to a combination of Emacs, Vim and Alchemist for an awesome development experience for Elixir.
My setup for development in Elixir relied upon combination of Vim and Tmux, as for many who might use Vim for Elixir. But Vim lacked a good plugin for Elixir and I craved more. That's when on the Elixir slack channel I stumbled upon Alchemist. Alchemist is an amazing plugin created by Samuel Tonini for working with Elixir, but it was on Emacs. I never tried emacs before but I knew I had to try it out. Moving to another editor looks like a daunting task, but it wasn't. Thanks to Spacemacs and EvilMode.
Spacemacs is a starter kit for Emacs but it has many changes from regular Emacs which makes it convenient for beginners and it comes bundled with EvilMode which is a VIM emulator for Emacs. This just made things a lot easier to get started with Emacs and still using the key bindings of VIM so you feel right at home. In this post we are going to see how to setup Spacemacs and Alchemist and then I'll go over some basic commands that will get you started in this amazing world of Emacs.
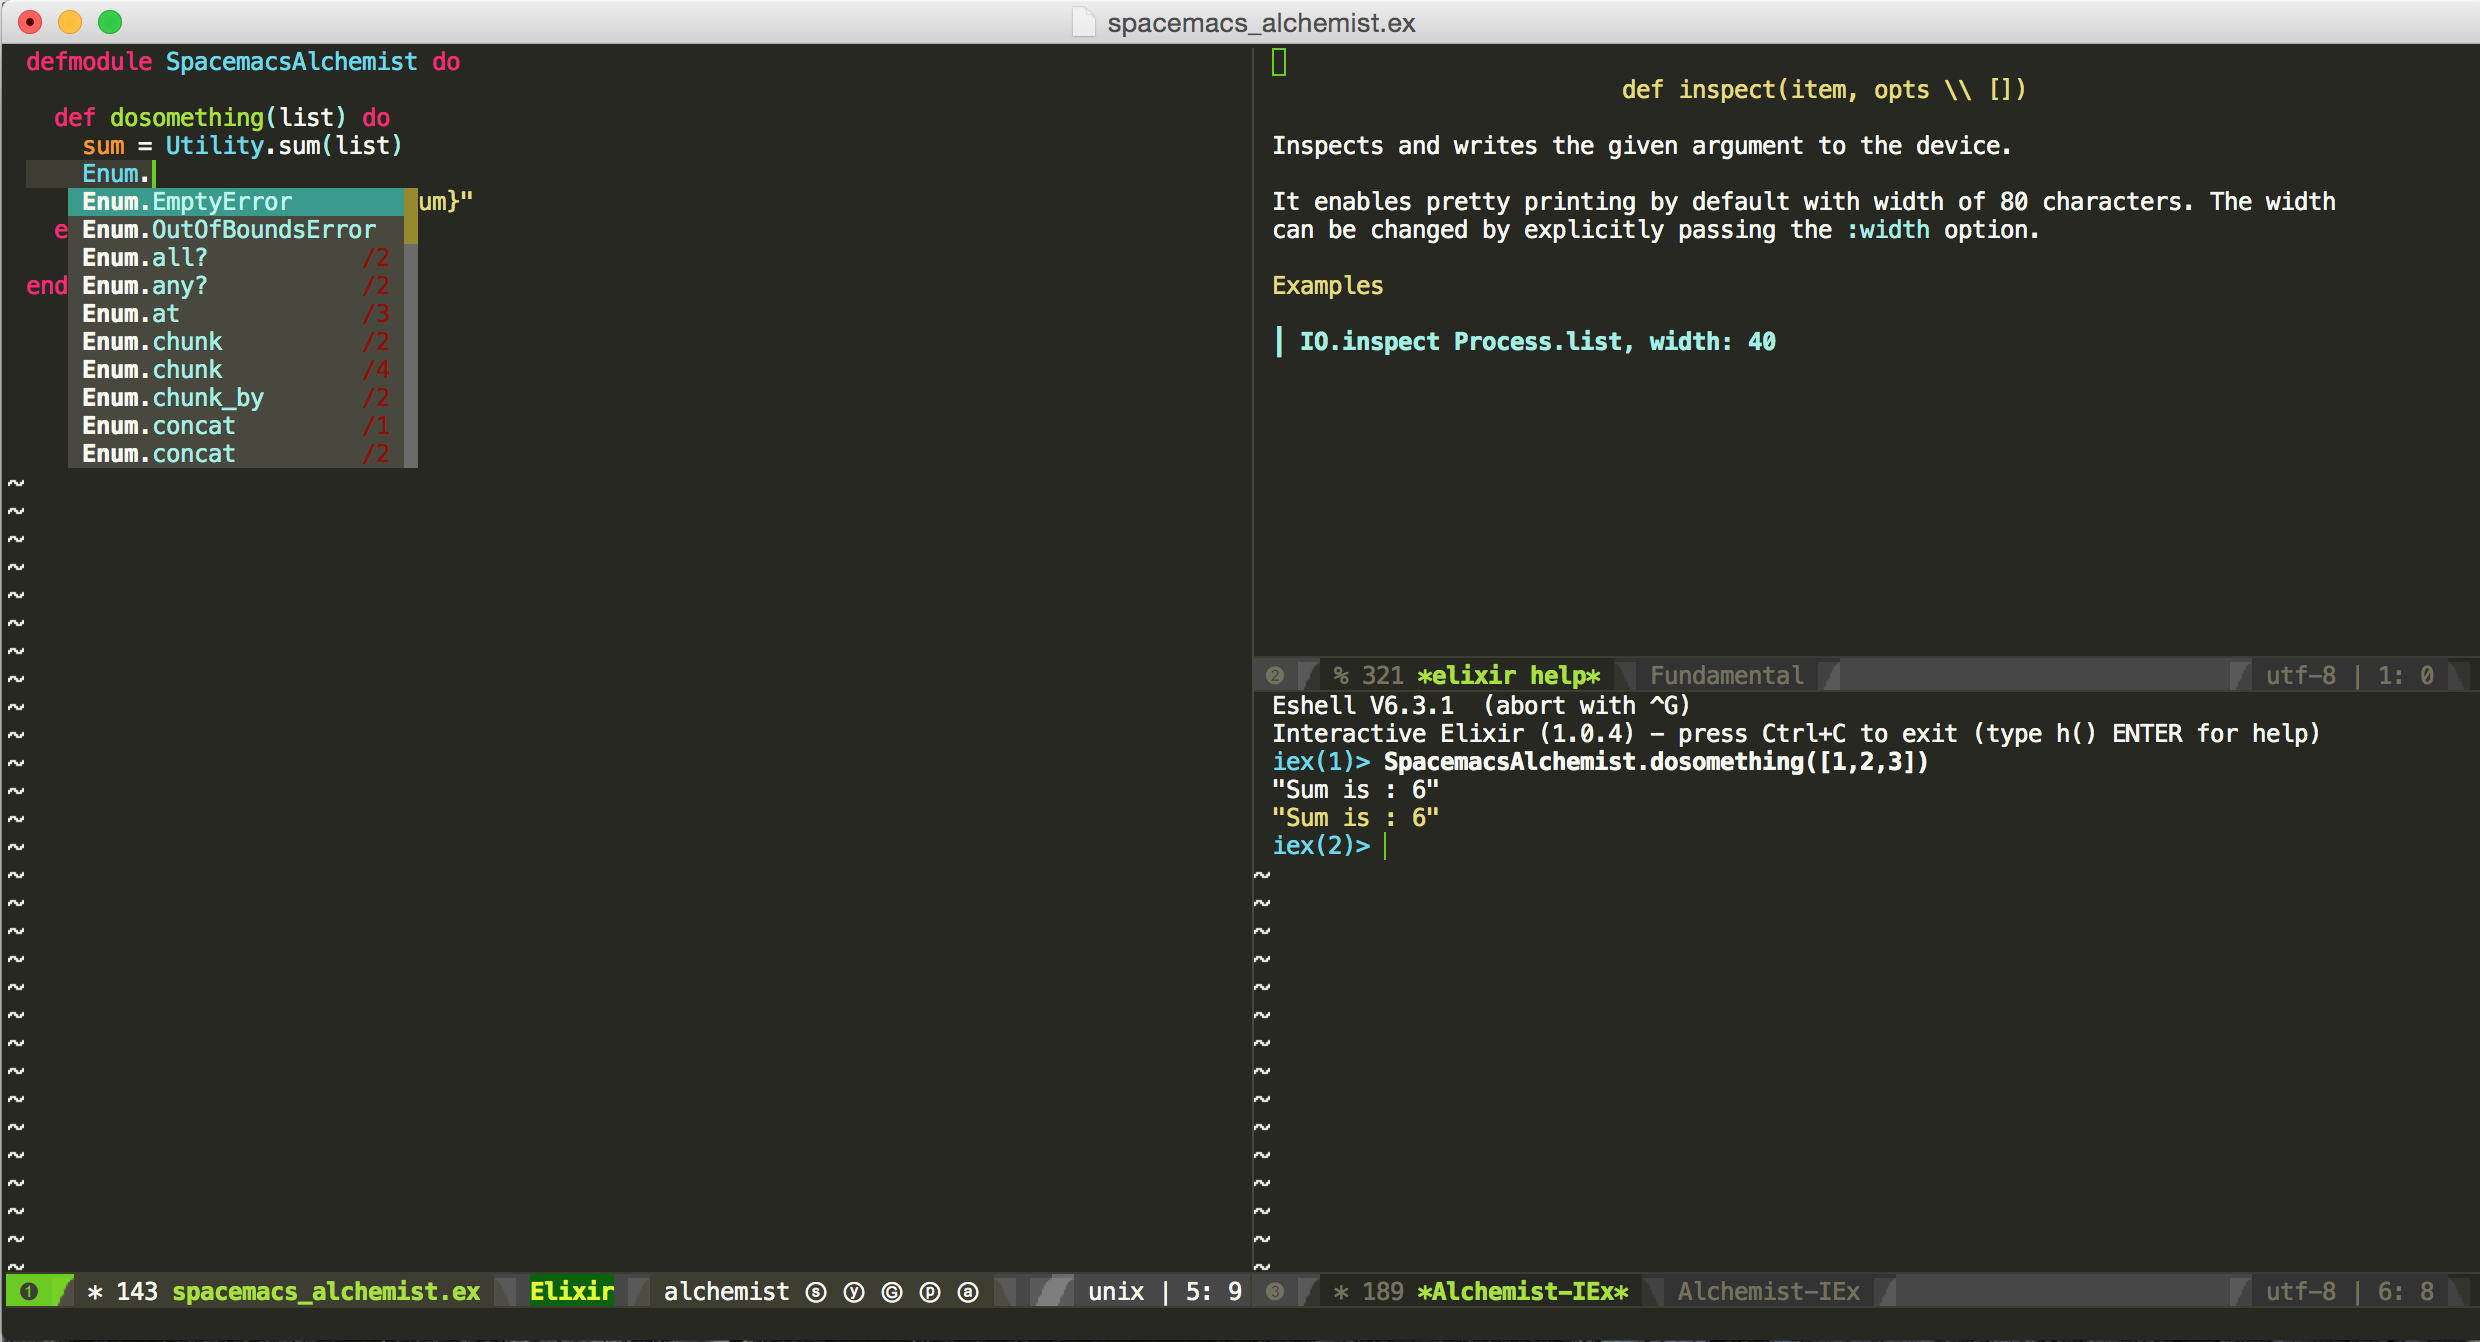
At the end you will have something like this, i.e. Editor, Autocompletion, IEx, documentation etc. all at one place.
Installation
I'm going to have the steps listed for OS X but it should be very similar for Linux.
First step is to install Emacs
$ brew tap railwaycat/emacsmacport
$ brew install emacs-mac
Then download the Application for Emacs from here. Once this gets installed, you can open Emacs and will be welcomed by the classic Emacs.
Now lets install Spacemacs. Everything Emacs has will be under ~/.emacs.d folder. Lets make a backup of this and replace it with Spacemacs version of it.
$ mv ~/.emacs.d ~/.emacs.backup
$ git clone --recursive https://github.com/syl20bnr/spacemacs.git ~/.emacs.d
Open your Emacs and spacemacs will load and as it's the first time so it is going to download whole bunch of packages and once it completes it will ask you about the preferred style. specify vim. Once it's done, just restart it. Now you have Spacemacs installed.
You can run it from terminal by righting emacs or through the application. I prefer application as it has more color ranges and other benefits.
Also bind Ctrl key to Capslock from keyboard settings in OS X otherwise you will torcher your little finger.
Spacemacs will take some time whenever you start it, but it should be fine as you are not usually supposed to close emacs but instead keep it running and keep opening new files in it.
Setup Alchemist
Spacemacs is organized in layers of configuration. You can create layers yourself but there are a lot of community created layers as well for various languages and functionalities which makes configuring spacemacs easy by just adding a layer name in configuration file and you are done.
Once you have emacs opened enter <SPC> f e d, this will take you to spacemacs configuration. You can navigate by using the regular vim keys i.e. hjkl. What keys you have been using in VIM should work here so you should feel at home when navigating and editing the file. Now lets add the configurations to setup Alchemist.
Make sure your dotspacemacs-configuration-layer looks like as following
dotspacemacs-configuration-layers
   '(
     emacs-lisp
     markdown
     syntax-checking
     auto-completion
     company-mode
     erlang
     elixir
     git
     osx
     html
     org
     colors
     editorconfig
     themes-megapack
     perspectives
     )
Spacemacs by default comes with some themes, if you don't like your theme you can change it under dotspacemacs-themes mine looks like following
dotspacemacs-themes '(monokai
                      solarized-light
                      leuven
                      zenburn
                      solarized-dark)
Save the file :w and restart emacs again and let it install the new packages. Once it's done you should have the alchemist installed as its part of the elixir layer.
Getting started with Spacemacs
In Spacemacs <SPC> is your leader key. When you press space it will open a small window at the bottom that will show you'r what commands are there. In this way spacemacs allows you to easily discover commands. Mostly used commands are prefixed into various group such as for buffer its b for windows its w and for Alcemist its m, this makes it easier to drill down based on what you are looking for.
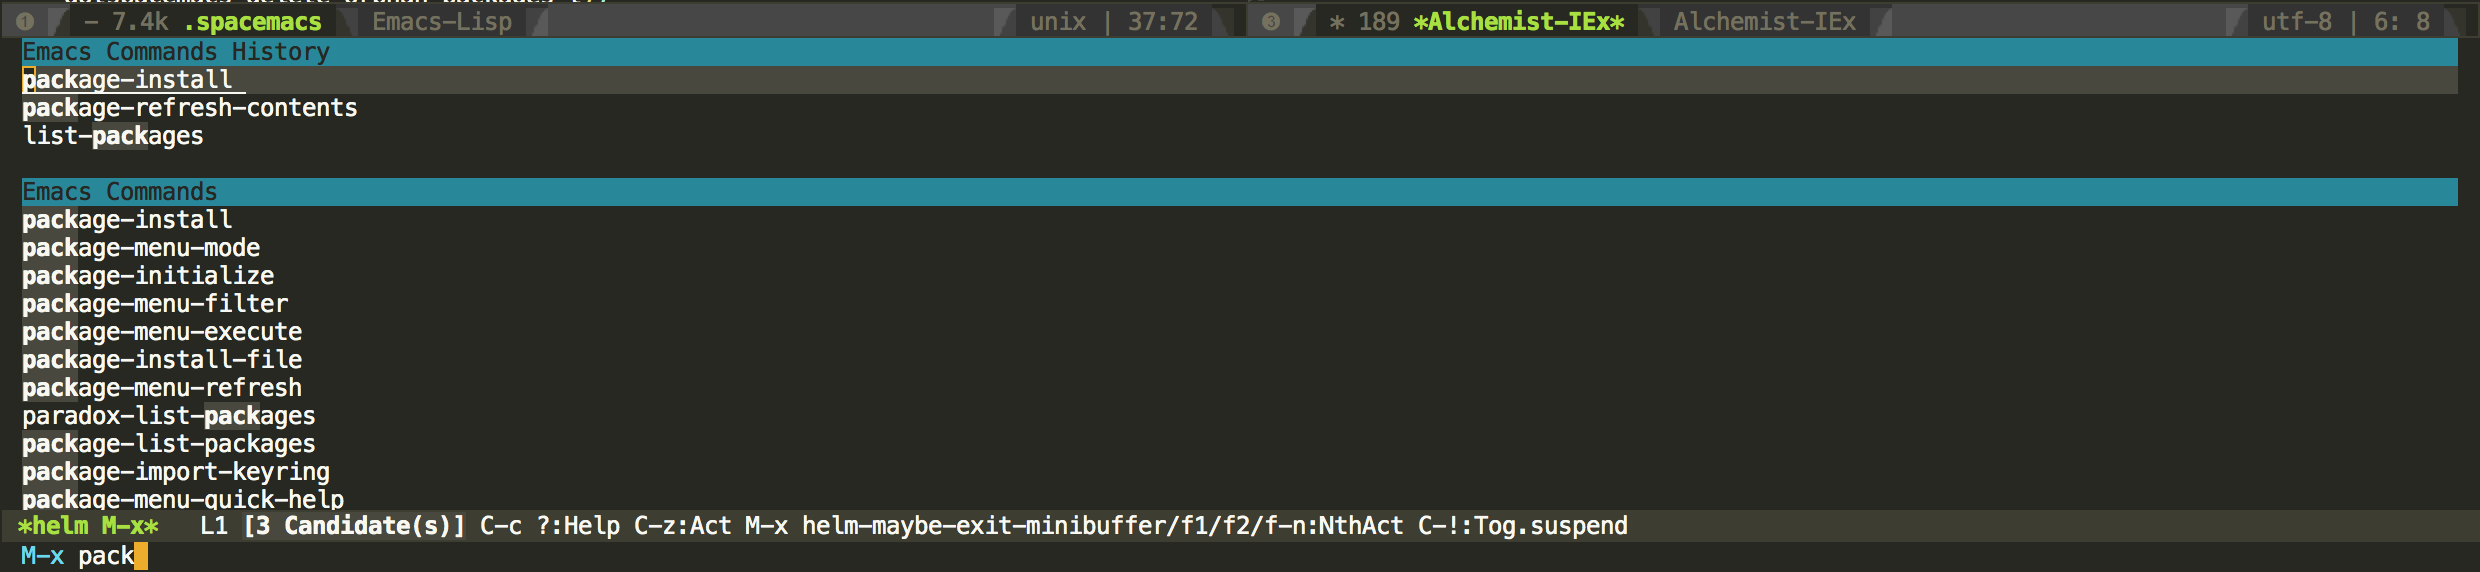
<SPC> : maps to M-x of emacs. When you stumble upon emacs guides you will find a lot of M-x which is usually called as Meta X or mex. Meta in regular emacs is <ALT> key and a - means they should be pressed together. In emacs everything is a command and I mean everything, even keypress triggers a command to insert that character. As everything is a command so you have key bindings which maps a command to a sequence of keys. You can always fall back to <SPC> : to find and run the command, and it will also show you the key binding associated to that command, if any. As you can see that I am looking for package-install command and it allows fuzzy search as well.
Few useful key bindings. Here C is <CTRL>
| Key Binding | Description | |
|---|---|---|
| C-x C-f | Open a file, or create a new one | |
| C-x C-c | Exit emacs | |
| C-h a | Its the apropos of the emacs. Use it to find a command e.g -word$ will result in all commands that end in -word | |
| C-g | Cancel any command that you are executing If anything goes wrong while you are using a command use this. |
These keys should get you started.
Buffers & Windows
In emacs buffers are where you manipulate or do something. Each file you open has a buffer associated with it but not all buffers have a file associated with it e.g. a shell buffer will not have a file, an empty buffer which acts as scratch pad while you work will not have a file associated with it unless you want to save it.
Press <SPC> b to see actions associated to buffer. <SPC> b b is very useful in switching to previously opened buffer as it allows you to fuzzy search your buffers. So as you keep opening files you want to navigate back and forth between them, that's when <SPC> b b is helpful. If you only want to go to the last buffer then you can use <SPC> <TAB>.
Windows are what splits your emacs into multiple different pieces. Press <SPC> w to see actions associated to windows. You can split it vertically <SPC> w / or horizontally <SPC> w -. You can switch between windows by <SPC> 0 .. <SPC> 9 or using <SPC> w j here J is direction keys of vim e.g. h,j,k,l.
Now you can go ahead and explore other usefull commands by just pressing <SPC> and looking at the information it shows.
Alchemist
Alchemist has a lot of useful features that allow you to navigate around your source code, auto completion, finding documentation, testing and running your code.
In the following gif I am using alchemist autocomplete functionality and then looking for documentation by <SPC> m h h, going to definition of a function by <SPC> m g g and going back <SPC> m ,. After I am done I compile my whole project using <SPC> m m c.
The alchemist commands are contextual, they will only work if you have an elixir file opened in the buffer.
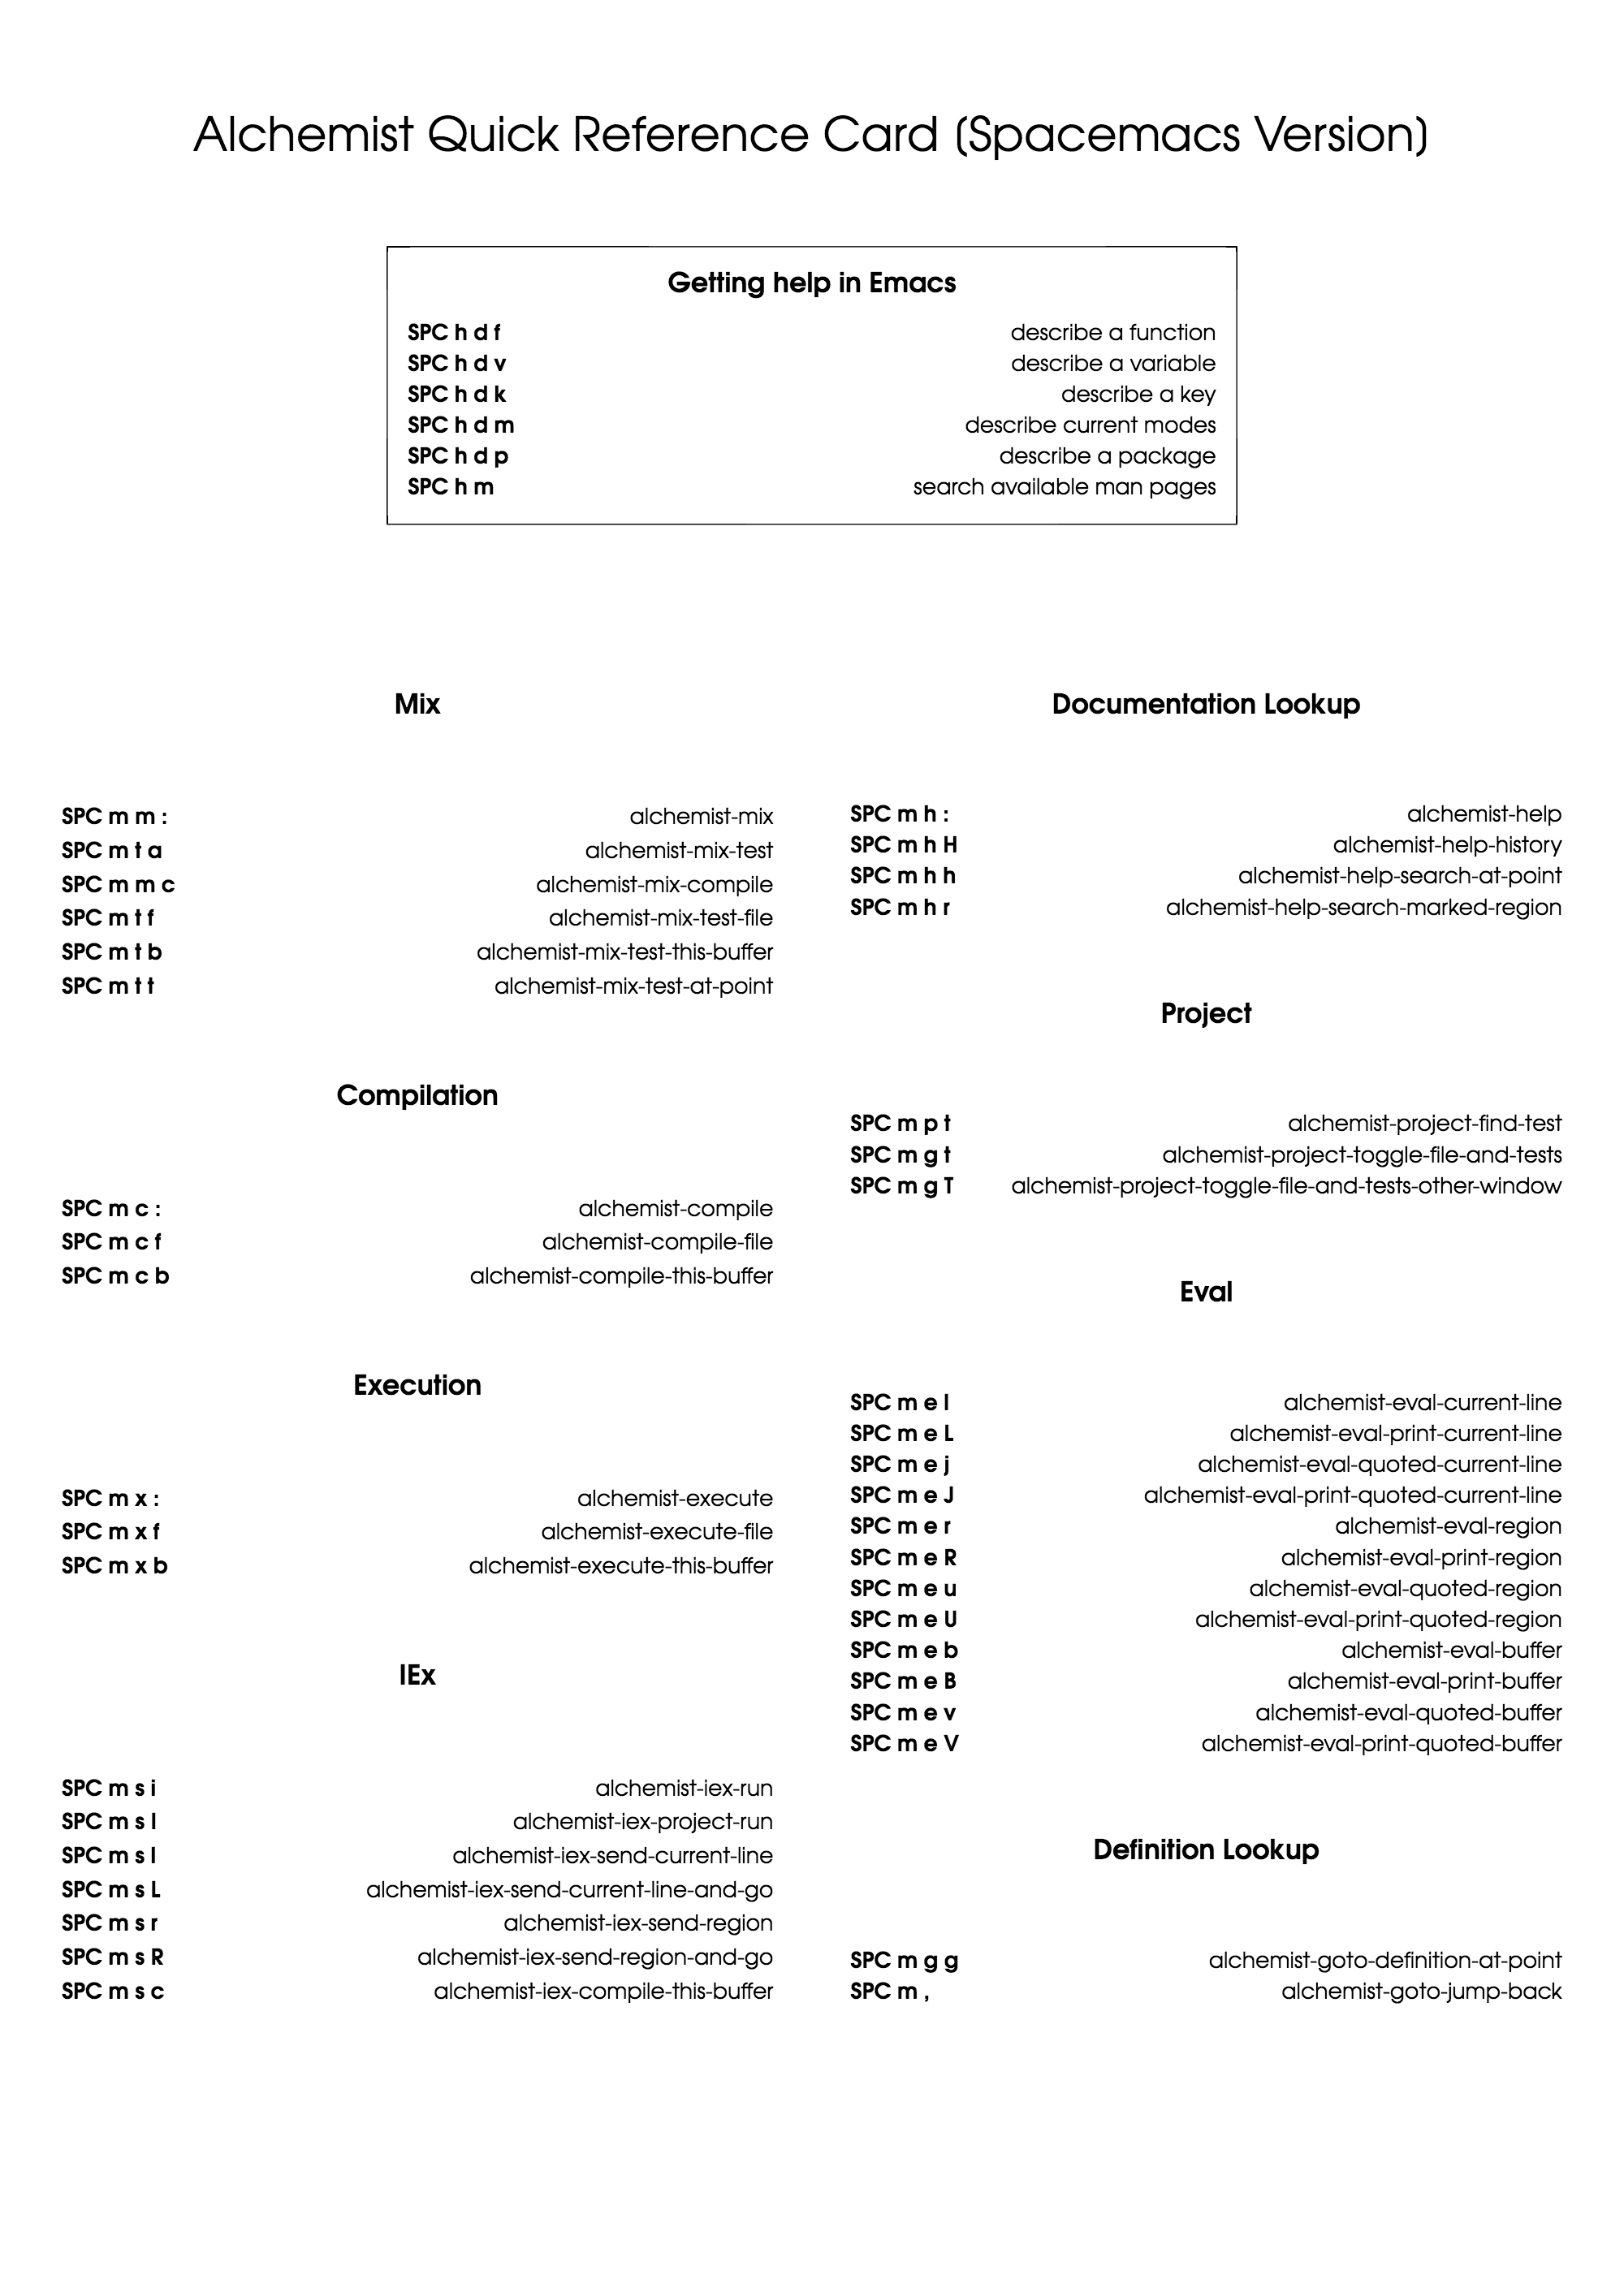
Here is the reference card for the commands that are supported. Just go quickly over it. Same information is available when you press <SPC> m as emacs is self documenting, so you don't have to remember before using it but instead will learn as you use it.
For the brave
If you want to ever change to the develop branch of alchemist then follow the step below to do that.
1. rm -R ~/.emacs.d/elpa/alchemist-XXXXXX.XXXX
2. git clone https://github.com/tonini/alchemist.el ~/.emacs.d/elpa/alchemist-XXXXXX.XXXX
3. Run emacs and then exit
4. Goto ~/.emacs.d/elpa/alchemist-XXXXXX.XXXX
5. git checkout develop
6. rm -R *.elc
7. Run emacs and now it should be using the alchemist-v1.0
Here alchemist-XXXXXX.XXXX is the version of alchemist you have under ~/.emacs.d/elpa.
Now go and be awesome with alchemist.
